
CI/CD Easy Way With GitLab
As a DevOps specialist I often struggle a lot with using some DevOps tools especially for the first time and end up spending tons of time trying to make things work. I also relish using awesome tutorials and guides that have been developed by other open source content creators to make my/our work easier. In that spirit I also enjoy creating content on things I learn that I believe will be useful to someone else out there. Find my other blogs on CI/CD with Jenkins here and Microsoft Azure App Services here
I was tasked to develop a CI/CD pipeline for our company Hepta Analyticsfor a project on a small budget to facilitate collaboration and ease integration of the components (backend and frontend). The backend is written in Java and Frontend in Angular. In this blog I will focus on the Java example and later will write about Angular setup. Note that this has not been tested in production and it’s just for integration and testing environment.
Major Things I Considered
- Cheap Hosting:-Definitely a cheap hosting because it’s a testing environment.
- Cheap Version Control:- We needed private repositories to host our code.
- Cheap Pipeline Tool:- Cheap and reliable pipeline tool that gives us control over how we want to deploy.
I choose to go with Digital Ocean because they provided a cheap droplet for only $5 per month and this would be enough for the integration environment. You can use my [referral link] (https://m.do.co/c/31318810e4c7) for a $100 in credit over 60 days during Hacktoberfest!
I also choose GitLab for version control and _pipeline configuratio_n because it offered one stop shop for everything including dicker image repository at $0. This was amazing but one thing I didn’t know was that setting up was not going be very straight forward.
Setting up a Private Repository
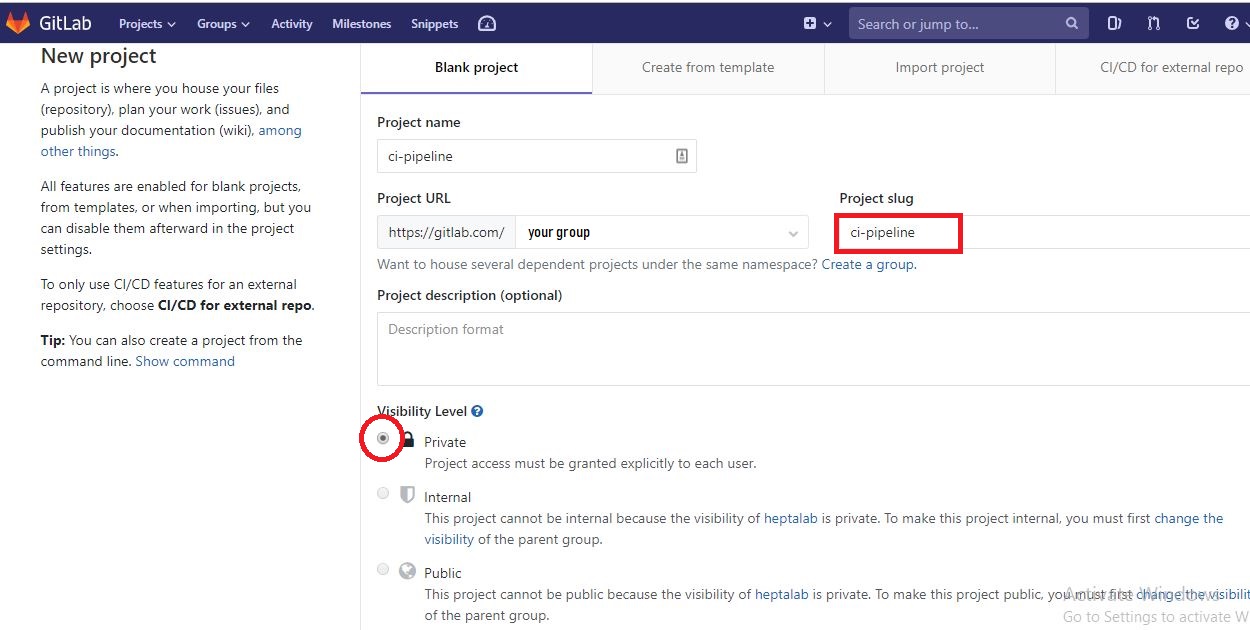
Create a GitLab account if you do not have one already and log in. You should also create a group in case you want to share this repo with other developers. Create a new private repository by clicking on the “New Project” button.
Provide repository information as shown below. Note on visibility level I choose private because I don’t want my code to be available to the public. Initialize repository with a README and click on “Create Project”.
This tutorial assumes your project code is in Java. In case you are using any other language remember to modify the “gitlab-ci.yaml” file accordingly.
You will need to create new files such as;
-
Dockerfile: Dockerfile is a text document that contains all the commands a user could call on the command line to assemble an image.
-
Docker compose file: The compose file is a YAML file defining services, networks and volumes needed to run a container. We will need this to run our application
-
Gitlab-ci.yaml file: This is a YAML file that is used by GitLab Runner to manage your project’s jobs. It outlines all the build, testing, deploy stages as required.
Push your code from your local machine to the GitLab repository we just created.
Configuring CI/CD Pipeline
From your repository click on set up a new CI/CD. This will prompt you to create a_ .gitlab-ci.yml_ file. You can paste your commands here or just push it directly from your local machine together with the rest of the code and configuration files.
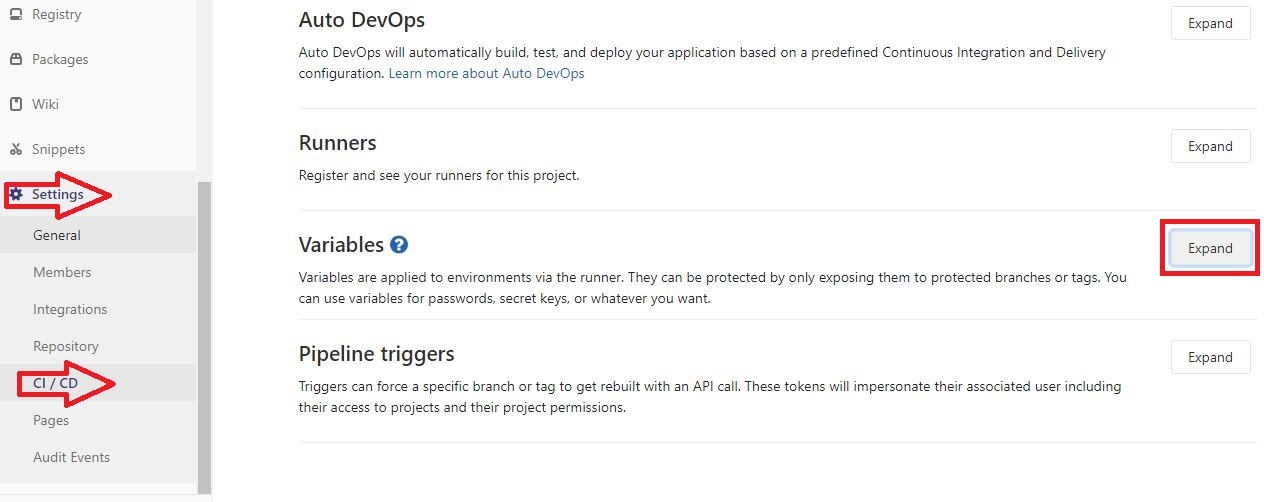
Still from the repository, select Settings followed by CI/CD. Under variables, click expand to see the fields you need to create.
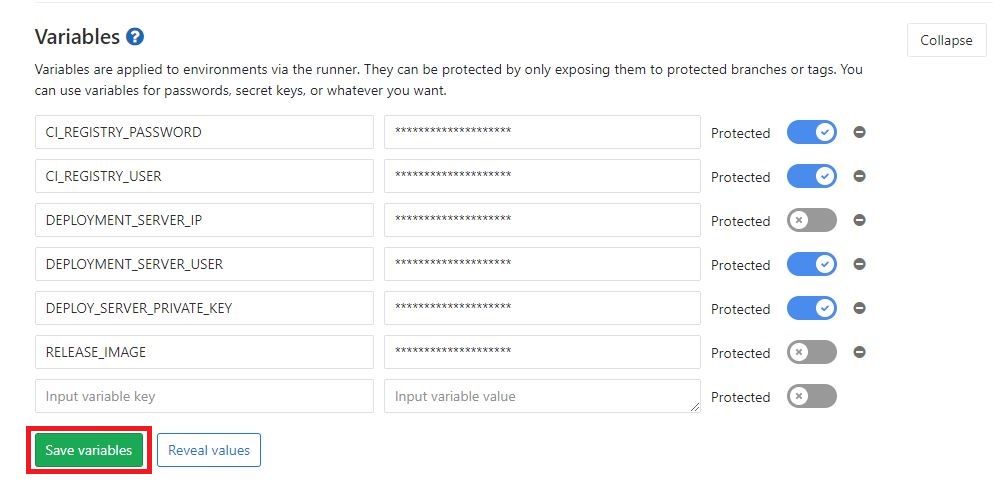
Provide the variable keys and values as shown on the screenshot below. Notice that these variables are used in the .gitlab-ci.yml file instead of having them as plain text in the file. It’s just a more secure way of handling your credentials and other important stuff. Notice that you will need to complete the next section to be able to get some of the values to the variables listed below.
This guide uses SSH to log into the deployment server and copy files such as docker-compose.yml from Gitlab to run the application.
Setting Up & Configuring a Droplet on Digital Ocean
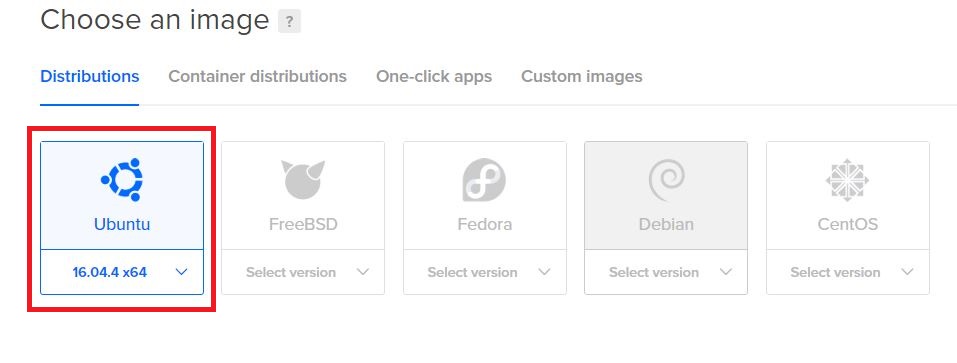
Login into digital ocean portal and click on Create then select Droplets. Select the base image of ubuntu 16.04.
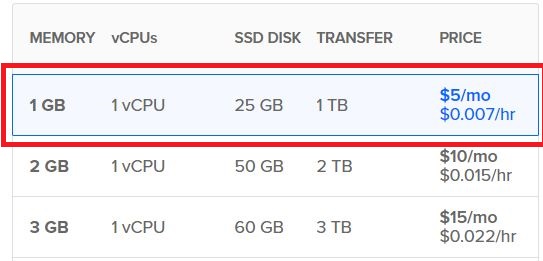
Choose the smallest droplet or a bigger one depending on your budget but the small size droplet would do the work.
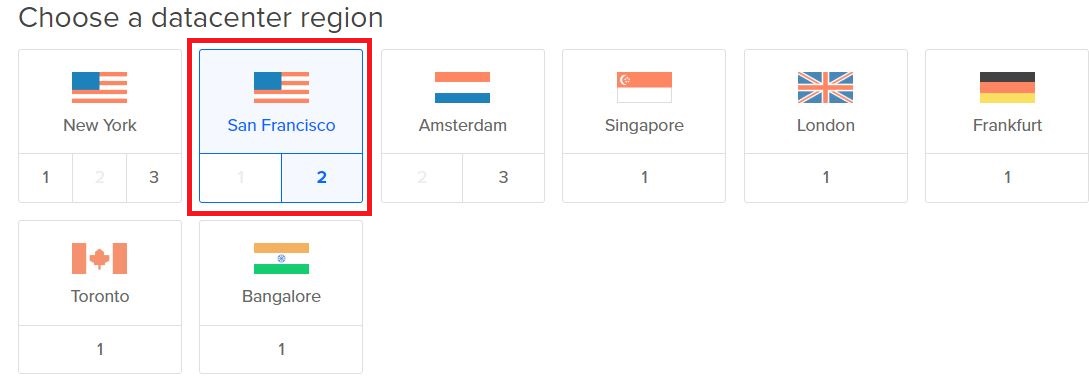
Select the region of your droplet depending your location and latency implications.
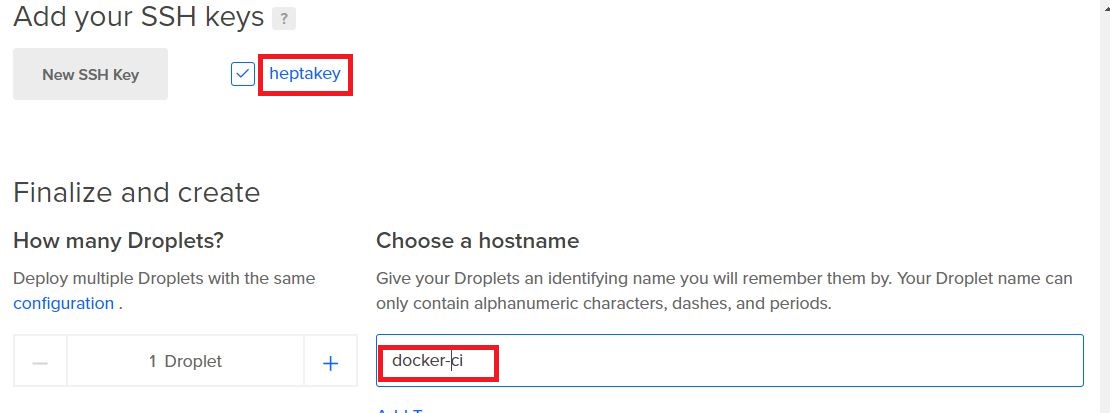
Select your SSH keys or create new ones or leave it blank to use username and password. Provide the name of the instance as well.
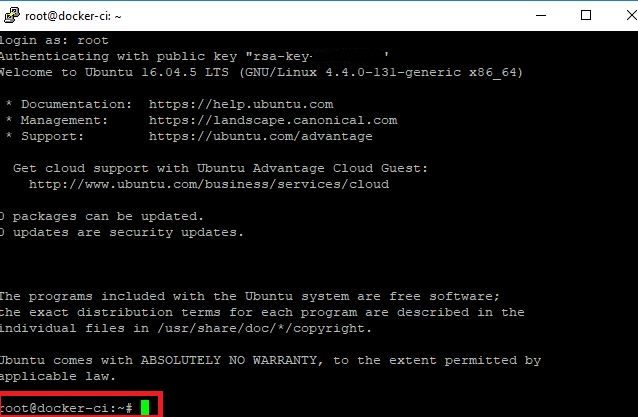
Hurray!, let’s now configure the server ready for deployment. Login with the SSH key you created/ username & password.
Install docker and docker compose consecutively following this tutorial docker docker compose.
Create the .ssh directory if it doesn’t already exist.
mkdir ~/.ssh
chmod 700 ~/.ssh
Create a ssh key pair. Leave all the question/answer fields blank. Don’t set a password or alternate name
ssh-keygen -t rsa
Display the public key using cat and manually copy it by highlighting the text with your mouse and copying it. Copy everything including the ssh-rsa to the machine name (Eg: root@your-server-ip). Save the public key into your authorized keys
cat ~/.ssh/id_rsa.pub
nano ~/.ssh/authorized_keys
chmod 600 ~/.ssh/authorized_keys
Copy your private key contents and use it to configure DEPLOY_SERVER_PRIVATE_KEY variable in our GitLab CI settings.
cat ~/.ssh/id_rsa
Make any changes, commit and push the code to trigger the pipeline and monitor what is happening from GitLab dashboard. To debug, you can print some messages in various steps to give you an insight as to what is happening. When the pipeline runs successfully, visit your server ip eg (126.34.54.26) followed by the port number which your application is running from.
Voila! you just deployed a successful pipeline and run your first application. You can view logs by running docker logs {container} from the deployment server.
All the code and configuration files you need can be found in my GitHub repository.
Hope you learnt something cool and can reach out if you are having challenges with this setup!.
To make a comment you have to login



0 Comments