
Hosting & Securing Your First Website On AWS S3 In 1hr
When you get to software development and develop your first static website using existing bootstrap/vuejs/reactjs templates, the next thing that you want to do is share your work with the public by hosting it. However, there are not many reliable and cheap dedicated website hosting solutions available to use. Previously I have written on hosting your first website on an ubuntu virtual machine.
In this blog I will use **AWS Simple Storage Service (S3) **to host a static website at a negligible cost compared to using a virtual machine(VM) or shared hosting.
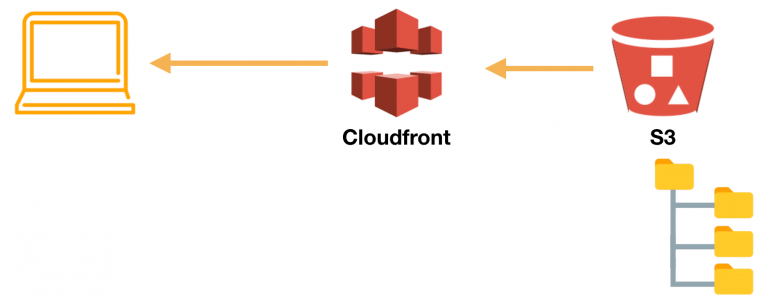
We will utilize AWS Certificate Manager to get a free certificate for our domain and AWS CloudFront which is a content delivery network (CDN) for improving performance of our application globally by providing low latency. Cloudflare will be used to configure DNS records of our domain.
It is important to note that this will only work for a static website and not ideal for a web application loading dynamic data.
Prerequisites
- You have developed a static website with index.htm file as the default page to load. Note if you are using any of the frontend frameworks you will need to compile the code and use the dist folder.
- list text here. You have basic familiarity with AWS console
- You have purchased a domain name
Creating S3 Bucket & Enabling Web Hosting
Navigate to S3 on AWS console and select create bucket button.Provide a name to the bucket as well as a desired region. Note that the name of the bucket must match the domain name that you want to use as shown below.

Un-check the Block all public access checkbox to allow public access to this bucket. If this is unchecked your website will not run as shown below and leave the rest of settings to default and create the bucket.

Next upload your website code to S3. If you have folders, make sure the index.html file isn’t inside a folder but instead default landing of the bucket. Easiest way to upload files is to drag and drop them on the bucket then click on upload. Once uploaded select the files and folders in the bucket then click actions followed by make public as shown below.

Next we enable static website hosting by navigating to properties inside the bucket and scrolling to the very bottom Static website hosting. Click on Edit button and on the new page the enable radio button followed by providing the Index document as shown below.

This will generate a dynamic link that you can use to test your application that starts with the name of your bucket eg: http://ben.techdock.xyz.s3-website-us-east-1.amazonaws.com open your link and your website should open. If it doesn’t work, confirm if you have made the objects in your bucket public and also allowed public access of the bucket.

Configuring DNS on Cloudflare
Login to cloudflare and under DNS, create a CNAME record for your domain using the link that we used earlier as the target (without http://) as shown below.

This will make sure that our website is accessible on http://ben.techdock.xyz. If this step does not work, confirm if the name of your S3 bucket matches the CNAME record you have created.
Generate Free SSL Certificate From AWS
Navigate to AWS Certificate Manager on the console and select Provision certificates. Select Request a public certificate followed by the button. Provide the domain you want to request certificate for. I recommend starting with *.domainname so that all the sub domains are covered by the certificate as well.

Next choose a validation method of your domain. If you choose DNS validation, you will need to create another CNAME record on Cloudflare to verify the ownership of the domain. Note that this step will take time but once done it will reflect on your AWS console dashboard.

Configure Amazon CloudFront
Navigate to CloudFront and create a new distribution. Select your S3 bucket on the domain name drop-down as shown below.

Under distribution settings, enter the CNAME record of your domain and select the certificate you created earlier after selecting on custom SSL as shown below.

Leave the other settings to default and create distribution. This takes a while to create so be patient.
CloudFront will generate a link for you that can be used to access the website such as: d1h92hy34pd.cloudfront.net
To be ale to access the application via your domain name, we need to update the Cloudflare CNAME record we created earlier with a new target. Replace ben.techdock.xyz.s3-website-us-east-1.amazonaws.com with the CloudFront link d1h92hy34pd.cloudfront.net
In this article, I have outlined the process of hosting a high performance static website for cheap using AWS S3 and associated technologies such as CloudFront and Certificate Manager.
Happy Hosting!
To make a comment you have to login
0 Comments